作者:OpenSLee
1. 背景知识
Helloworld 实验总是各种编程语言的开始第一课,这里我们将使用xilinx zynq-7000芯片ARM端完成串口打印”Helloworld”实验,旨在体验一下zynq-7000 的开发流程,为以后的zynq-7000的开发打下基础。
2. Zynq-7000 HelloWord
本人使用的zynq-7000芯片为xc7z010clg400。
Vivado的工程创建我们在这里就不在详述。
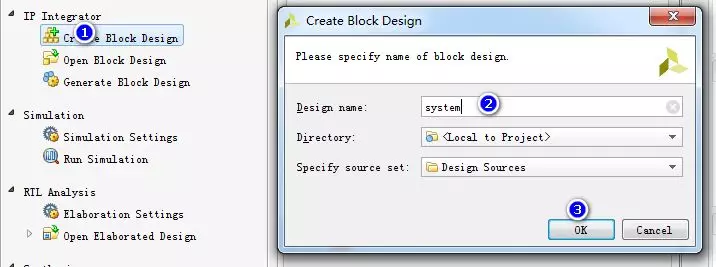
1) Create Block Design
点击Create Block design >>填写Design name >> OK 如下图所示。
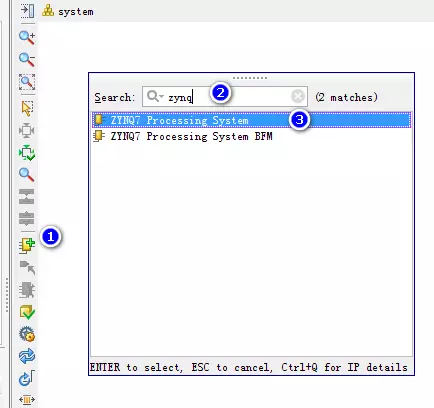
2) 添加ZYNQ7 Processing System
点击 Add IP>> 搜索zynq>>选着ZYNQ7 Processing System 如下图。
3) 配置ZYNQ7 Processing System
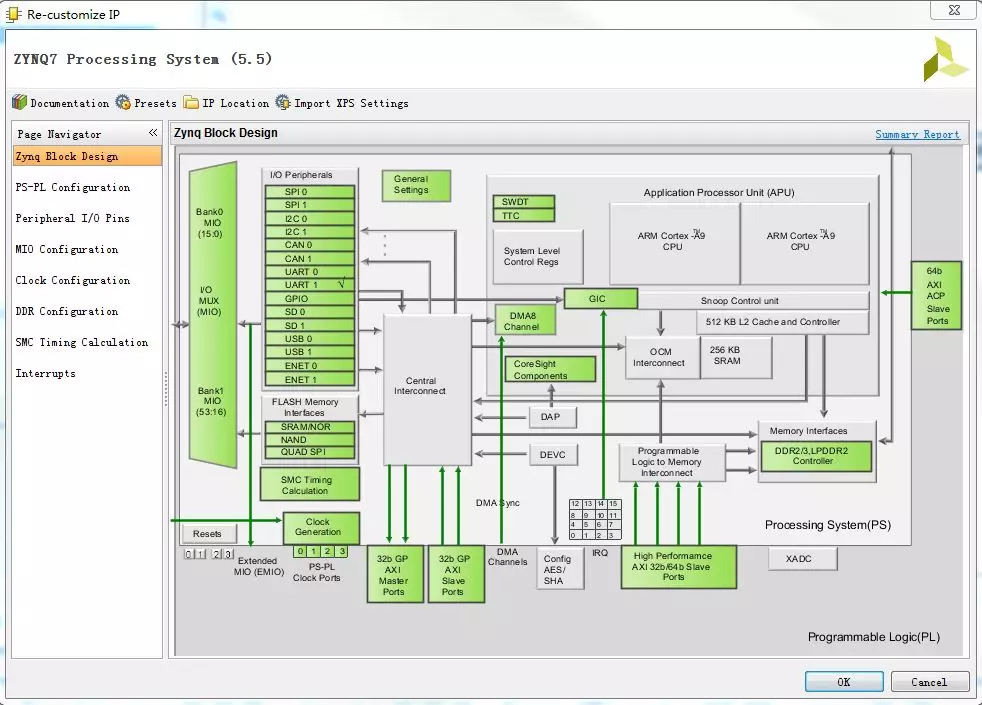
一般Zynq Block 需要配置:
(1) PS-PL Configuration PS端到PL端的配置
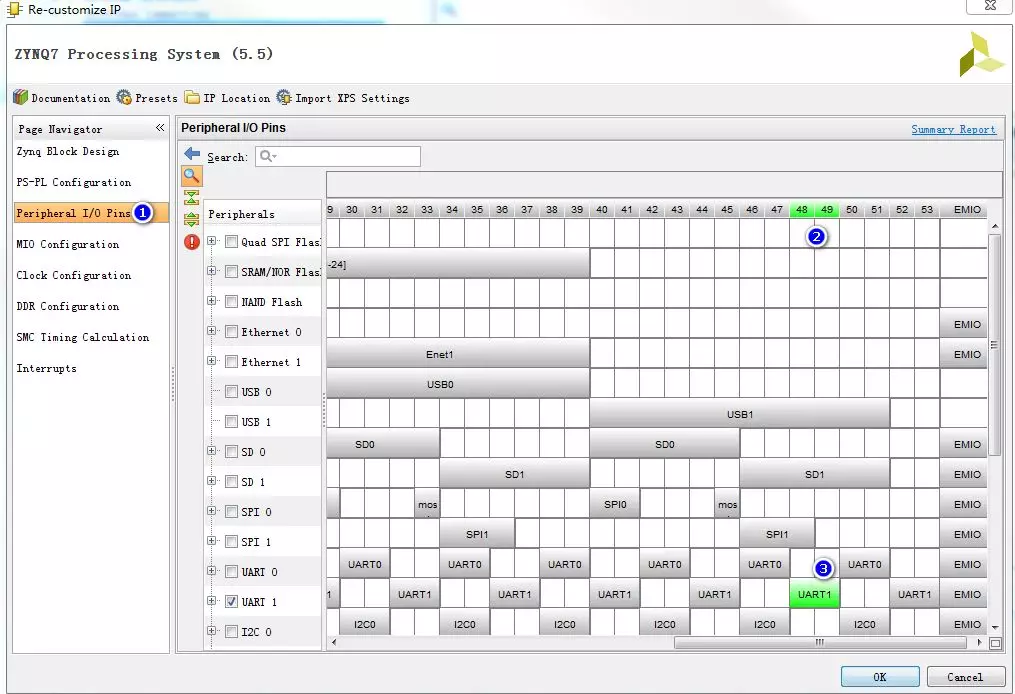
(2) Peripheral I/O Pins
(3) MIO Configuration MIO配置
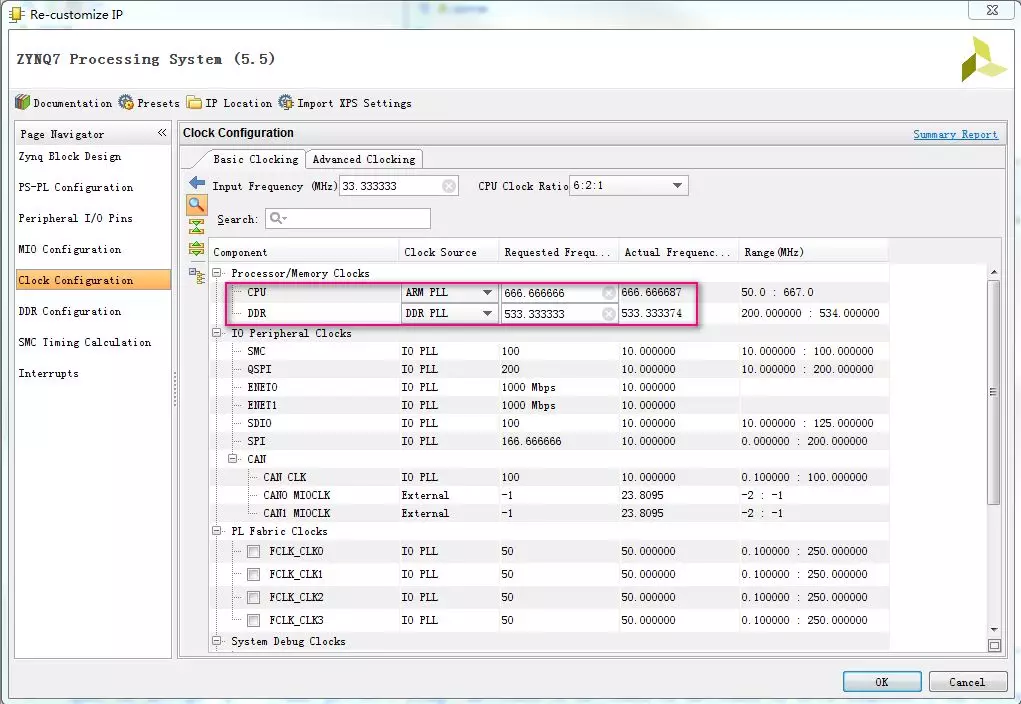
(4) Clock Configuration 时钟配置
(5) DDR Configuration DDR的配置
(6) SMC Timing Calculation
(7) Interrupts
这里我们需要用到PS端的UART。
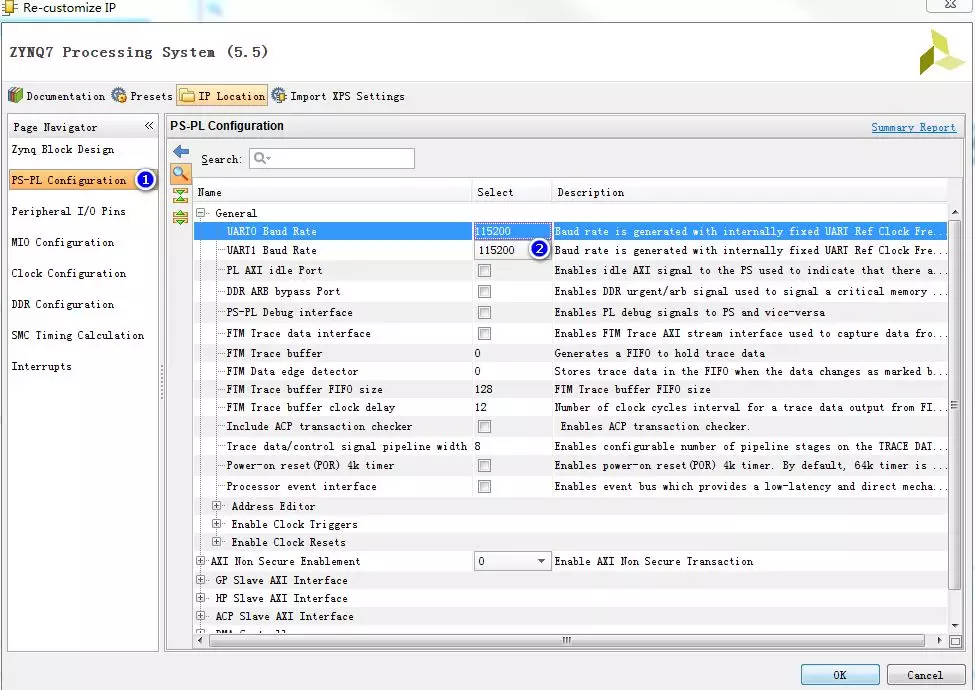
我们选择PS-PL Configuration>>General >>UART1 Baud Rate 配置为115200
Peripheral I/O Pins 根据自己的硬件连线来选择。
MIO Configuration 如下图,选择uart1,电压选择1.8V


Clock Configuration如下图。
DDR Configuration 根据自己开发板的DDR进行配置。

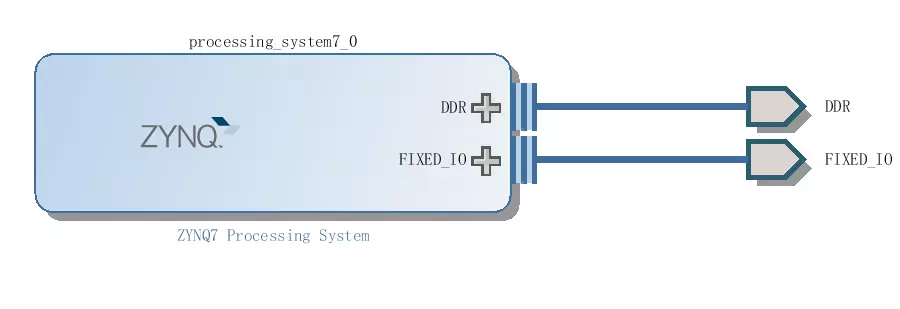
配置ZYNQ7 Processing System 完成。最终如下图所示。
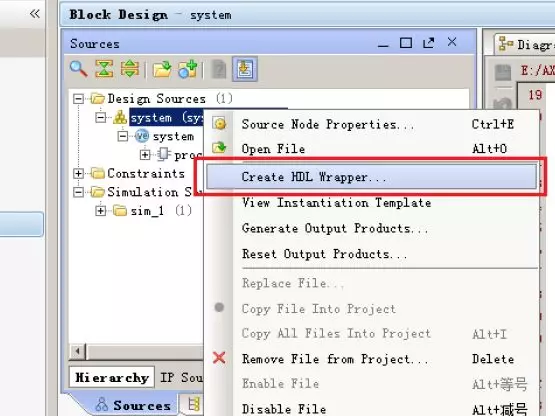
4) Generate Output Products... 和Create HDL Wrapper...
首先选中system右键选中Generate Output Products...

选中system右键选中Create HDL Wrapper...
5) 硬件导入SDK
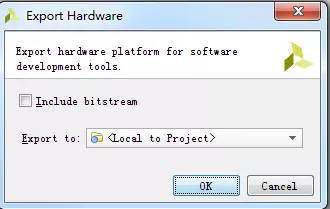
(1) 导出硬件 选择菜单File->Export->Export Hardware...。这里不包括bitstream
(2) Launch SDK 选择菜单File->Launch SDK,启动SDK环境。

6) SDK程序开发
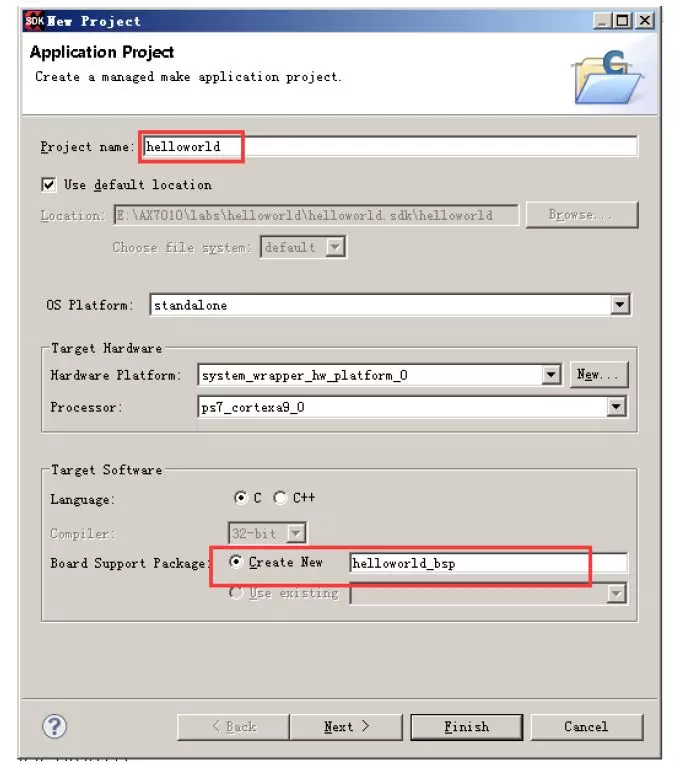
(1)选择菜单File->New->Application Project, 新建一个SDK软件工程。
(2)输入工程名字为helloworld, 生成一个新的bsp文件。
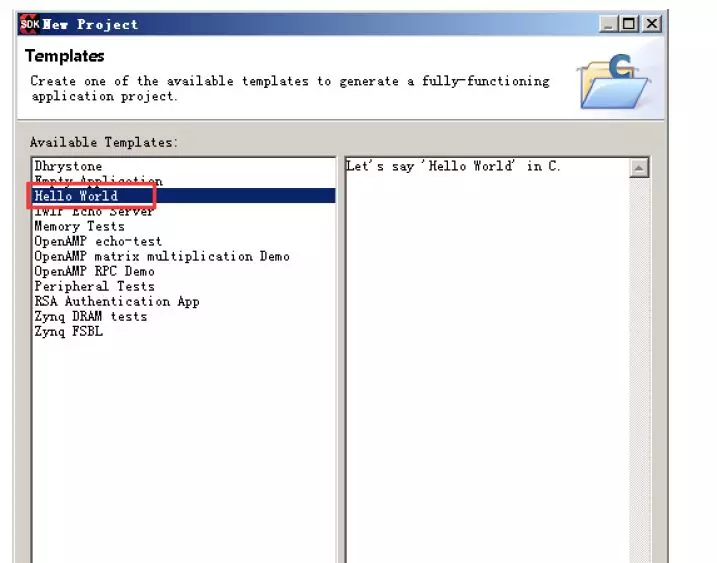
(3) 选择工程模版Hello World。
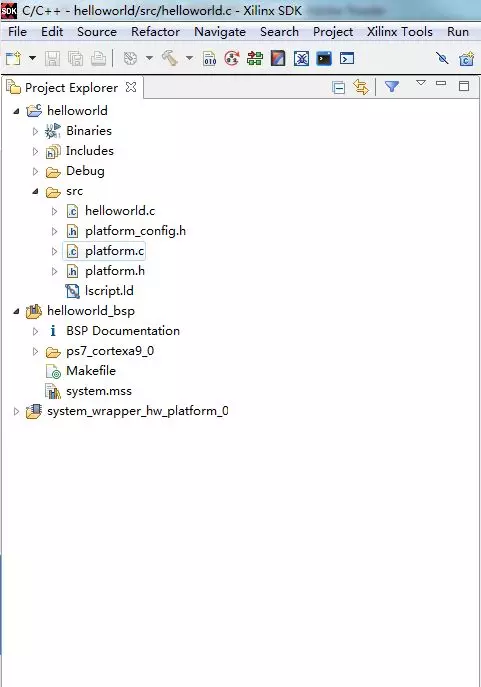
生成后的helloworld工程和BSP支持包如下。
(4) 右键选择helloworld工程,选择Build Project,编译一下。

整个uart打印HelloWord的工程建立到此完成。
为了让串口多打印几次我们修改helloworld.c如下:
#include
#include "platform.h"
void print(char *str);
int main()
{
int i,j;
init_platform();
for (i = 0; i<100; i++)
{
for(j =10; j> 0; j--)
{
print("Hello World\n\r");
print("Hello FPGA Open Source Studio Lee\n");
}
}
cleanup_platform();
return 0;
}
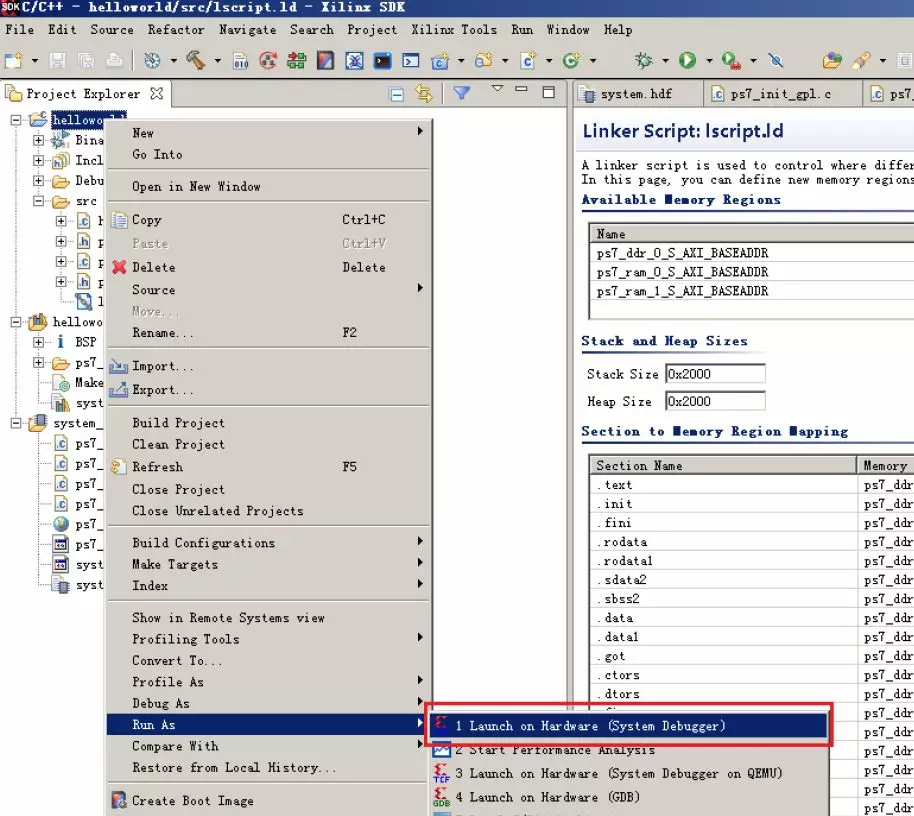
7) 下载和调试
连接好硬件和打开串口工具后,右键选择helloworld工程,再选择Run as->1. Launch on Hardware (sysntem Debugger)如下图:
结果如下图所示:

总结:
本节虽然简单但是演示了整个zynq-7000的开发流程。为其他zynq-7000工程开发打下基础。
文章转载自:FPGA开源工作室