作者:张大侠 文章来源:傅里叶的猫
vivado有project模式和non-project模式,project模式就是我们常用的方式,在vivado里面新建工程,通过GUI界面去操作;non-project模式就是纯粹通过tcl来指定vivado的流程、参数。
相比于project模式,non-project模式的优势如下:

总结下来就是,不仅节省空间,还更加灵活。
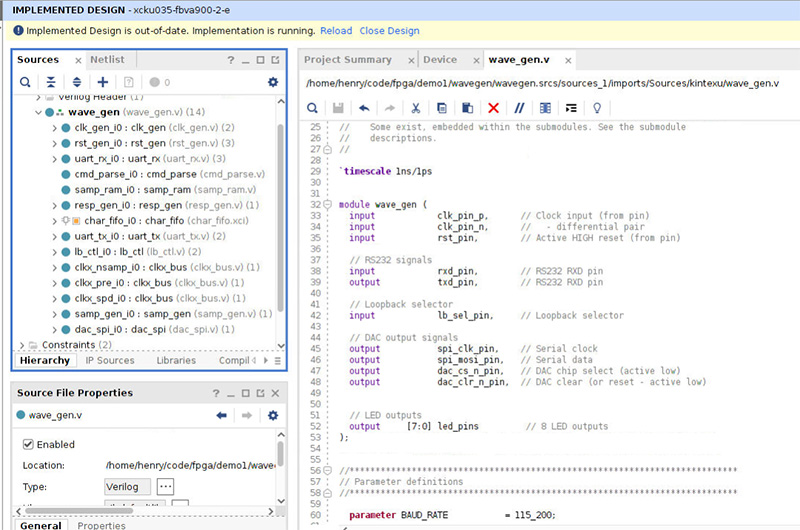
下面我们以vivado中自带的wavegen工程为例:

为了更加快捷的完成non-project的tcl内容,我们可以先把wavegen工程进行Synthsis和Implementation,在wavegen.runs下面会生成synth_1和impl_1的两个目录,这两个目录都有wavegen.tcl,我们可以直接将里面的有用内容copy出来,用来创建non-project的tcl,具体操作就不展开细讲了,直接把最终的tcl文件展示出来,就很很容易理解了:
# ======================================================== //
# FileName      :   build.tcl
# Author        :   Zhang Haijun
# Version       :   v1.0
# Discription   :   vivado -mode batch -source build.tcl
# ======================================================== //
#!/usr/bin/tclsh
set_param general.maxthreads 8
set_part xcku035-fbva900-2-e
# read files
read_verilog /home/henry/fpga/wavegen/wavegen.srcs/sources_1/imports/Sources/clogb2.vh
read_verilog -library xil_defaultlib {
  /home/henry/fpga/wavegen/wavegen.srcs/sources_1/imports/Sources/kintexu/clk_div.v
  /home/henry/fpga/wavegen/wavegen.srcs/sources_1/imports/Sources/kintexu/clk_gen.v
  /home/henry/fpga/wavegen/wavegen.srcs/sources_1/imports/Sources/kintexu/clkx_bus.v
  /home/henry/fpga/wavegen/wavegen.srcs/sources_1/imports/Sources/kintexu/cmd_parse.v
  /home/henry/fpga/wavegen/wavegen.srcs/sources_1/imports/Sources/kintexu/dac_spi.v
  /home/henry/fpga/wavegen/wavegen.srcs/sources_1/imports/Sources/kintexu/debouncer.v
  /home/henry/fpga/wavegen/wavegen.srcs/sources_1/imports/Sources/kintexu/lb_ctl.v
  /home/henry/fpga/wavegen/wavegen.srcs/sources_1/imports/Sources/kintexu/meta_harden.v
  /home/henry/fpga/wavegen/wavegen.srcs/sources_1/imports/Sources/kintexu/out_ddr_flop.v
  /home/henry/fpga/wavegen/wavegen.srcs/sources_1/imports/Sources/kintexu/reset_bridge.v
  /home/henry/fpga/wavegen/wavegen.srcs/sources_1/imports/Sources/kintexu/resp_gen.v
  /home/henry/fpga/wavegen/wavegen.srcs/sources_1/imports/Sources/kintexu/rst_gen.v
  /home/henry/fpga/wavegen/wavegen.srcs/sources_1/imports/Sources/kintexu/samp_gen.v
  /home/henry/fpga/wavegen/wavegen.srcs/sources_1/imports/Sources/kintexu/samp_ram.v
  /home/henry/fpga/wavegen/wavegen.srcs/sources_1/imports/Sources/kintexu/to_bcd.v
  /home/henry/fpga/wavegen/wavegen.srcs/sources_1/imports/Sources/kintexu/uart_baud_gen.v
  /home/henry/fpga/wavegen/wavegen.srcs/sources_1/imports/Sources/kintexu/uart_rx.v
  /home/henry/fpga/wavegen/wavegen.srcs/sources_1/imports/Sources/kintexu/uart_rx_ctl.v
  /home/henry/fpga/wavegen/wavegen.srcs/sources_1/imports/Sources/kintexu/uart_tx.v
  /home/henry/fpga/wavegen/wavegen.srcs/sources_1/imports/Sources/kintexu/uart_tx_ctl.v
  /home/henry/fpga/wavegen/wavegen.srcs/sources_1/imports/Sources/kintexu/wave_gen.v
}
# read ip
read_ip -quiet /home/henry/fpga/wavegen/wavegen.srcs/sources_1/ip/clk_core/clk_core.xci
read_ip -quiet /home/henry/fpga/wavegen/wavegen.srcs/sources_1/ip/char_fifo/char_fifo.xci
# read constraints
read_xdc /home/henry/fpga/wavegen/wavegen.srcs/constrs_1/imports/xcku035-fbva900-2-e/wave_gen_timing.xdc
read_xdc /home/henry/fpga/wavegen/wavegen.srcs/constrs_1/imports/xcku035-fbva900-2-e/wave_gen_pins.xdc
# generate ips
generate_target all [get_ips]
# synthesize design
synth_design -top wave_gen -part xcku035-fbva900-2-e
write_checkpoint -force -noxdef synth.dcp
# opt_design
opt_design
write_checkpoint -force opt.dcp
# place design
place_design
write_checkpoint -force placed.dcp
phys_opt_design
write_checkpoint -force physopt.dcp
# route design
route_design
write_checkpoint -force routed.dcp
report_timing_summary -max_paths 10 -report_unconstrained -file wave_gen_timing_summary_routed.rpt -pb wave_gen_timing_summary_routed.pb -rpx wave_gen_timing_summary_routed.rpx -warn_on_violation
#write bitfile
write_bitstream -force ./wave_gen.bit
对于综合时间上,理论上non-project模式要比project模式快一些,因为project模式会把每一步的结果都写入到磁盘中,但non-project中,我们只需要把我们想需要的文件存下来。
在上面的脚本中,也基本上把每一步的结果都存了下来,而且本身Synthsis和Implement的时间也不到2分钟,所以跟project模式的时间并没有明显差别。


