1 概述
通过Vivado 自带的ibert工具可以对FPGA的GT进行板机的硬件调试。通过ibert可以观察眼图,获取误码率以及调节串行收发器的参数。验证信号的稳定性和信号完整性,从而预判可能存在的问题。另外在做ibert测试之前,建议先了解GT的结构,否则很多参数设置看的是一脸茫然......
2 IP配置及测试
ibert中的BERT是比特错误概率测试(Bit Error Ratio Test)的缩写,即误码率测试。Vivado中ibert工具的测试原理是通过收发器的回环实现,通过比对发送/接收的数据,从而得出接收端误码的统计值。
ibert的核配置及使用可以参考网上的其他教程,在此不再赘述。
3 ibert核无法识别
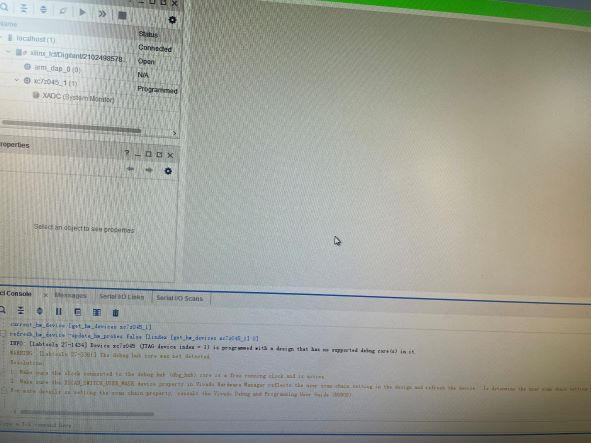
该文主要记录下下载完bit文件后无法识别ibert核的问题。

WARNING: [Labtools 27-3361] The debug hub core was not detected.
Resolution:
Make sure the clock connected to the debug hub (dbg_hub) core is a free running clock and is active.
Make sure the BSCAN_SWITCH_USER_MASK device property in Vivado Hardware Manager reflects the user scan chain setting in the design and refresh the device. To determine the user scan chain setting in the design, open the implemented design and use 'get_property C_USER_SCAN_CHAIN [get_debug_cores dbg_hub]'.
For more details on setting the scan chain property, consult the Vivado Debug and Programming User Guide (UG908).
根据提示,翻阅ug908以及参考其他资料,ug908上有指明 “The JTAG chain is as fast as the slowest device in the chain.”
在xilinx的forum上有个QA,Data read from hw_ila is corrupted 。其中提到 “Can you please check whether your JTAG frequency is lower than ILA clock frequency? It is recommended to keep the JTAG frequency half or less than half of ILA clock frequency.”
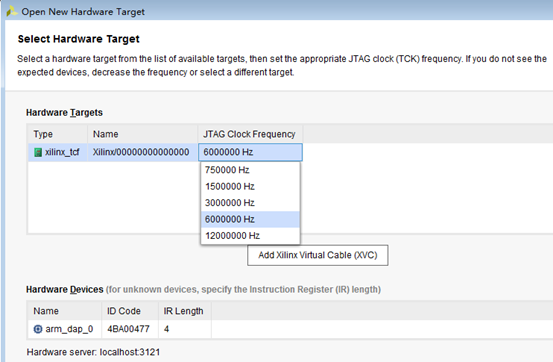
为了解决该问题可以把jtag仿真器的频率降下去。操作前先关掉之前打开的hardware,降频步骤如下:Program and Debug --> Open hardware manager--> Open Target --> Open new target 。

————————————————
版权声明:本文为CSDN博主「卖红薯的小孩」的原创文章,遵循CC 4.0 BY-SA版权协议,转载请附上原文出处链接及本声明。
原文链接:https://blog.csdn.net/xbx515626/article/details/123346298


