作者:Hong Han,AMD开发工程师
当使用第三方综合器比如 Synopsys® Synplify Pro或Mentor® Graphics Precision 来综合包含Xilinx IP的设计时,UG896推荐的方式是创建并定制IP,生成这些IP的outout product(包括IP的dcp);然后把第三方生成的网表文件和IP XCI 的相关文件都加到vivado的post-synthesis工程中。
此时第三方综合器只是综合用户的RTL代码,IP代码的综合实际还是由Vivado完成,然后在新的Vivado工程中把这些IP的网表和第三方综合器生成的顶层网表合并(在Vivado中的link_design步骤实现)
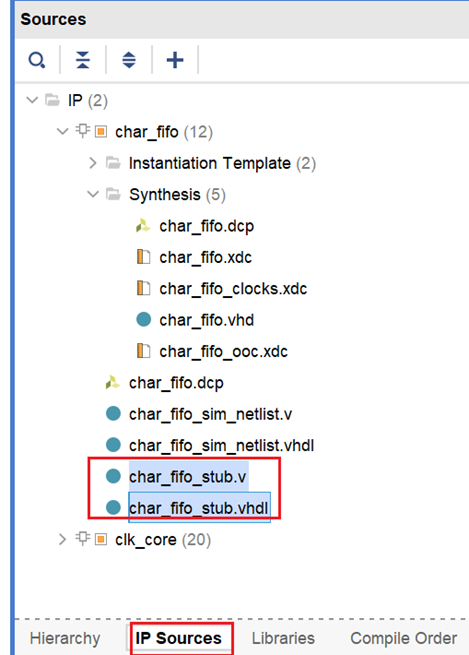
第三方综合器由于并不实际综合IP的代码,在第三方综合器综合的过程中,只需要提供IP的黑盒文件,让第三方综合器了解IP模块的接口即可. 生成IP output product时得到的stub文件就是黑盒文件(
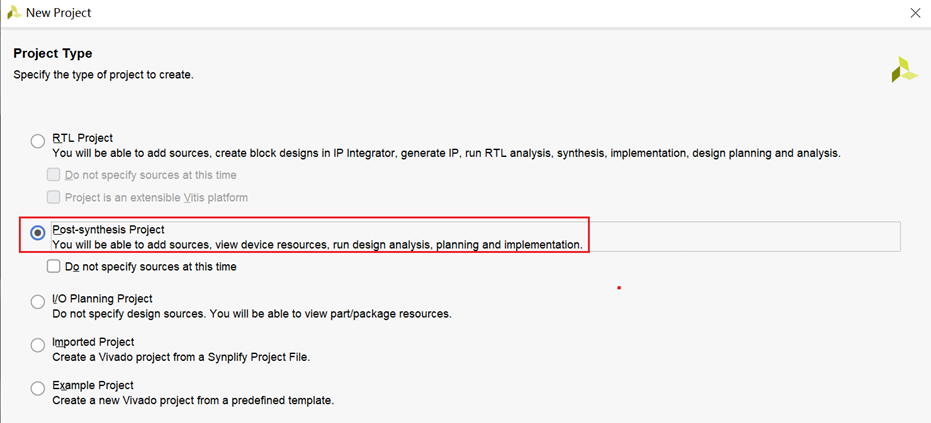
以下是在GUI下创建Post-synthesis 工程的界面:
UG896中提供的示意Tcl脚本如下:
# Create a project on disk
create_project
set_property design_mode -GateLvl [current_fileset]
# Add in the netlist from third-party synthesis tool
add_files top.edif
# Add in XCI files for the IP
add_files {ip1.xci ip2.xci ip3.xci}
# Add in top level constraints: this might include XDC files from the third-party
# synthesis tool
add_files top.xdc
# Launch implementation
launch_run impl_1 -to write_bitstream
我们在Vivado 2022.2,尝试使用以上的脚本编译一个例子工程看看是否会遇到困难。
实验使用的脚本如下:
wave_gen.edf 为顶层设计网表,包含IP char_fifo
cd ./current_work_dir ; #修改work dir
create_project wave_gen -part xcku035-fbva900-2-e
set_property design_mode "GateLvl" [current_fileset]
add_files ../wave_gen.edf
add_files ../tt/char_fifo.xci
launch_run impl_1
结果IP char_fifo没能加到新的工程中,并报出以下的错误:
ERROR: [Project 1-680] Sub-design 'char_fifo.xci' does not have a generated DCP. Please open this sub-design and generate with synth_checkpoint_mode as 'Singular' in original project before adding it to current project.
之所以报错的原因是为了新建工程,我们移动了IP的XCI文件,但是却没有移动IP原来生成在gen目录的output product。
直接用第三方编译器打开xci文件,查看outputdir. 这是之前的output product所在的目录相对于XCI文件的目录。
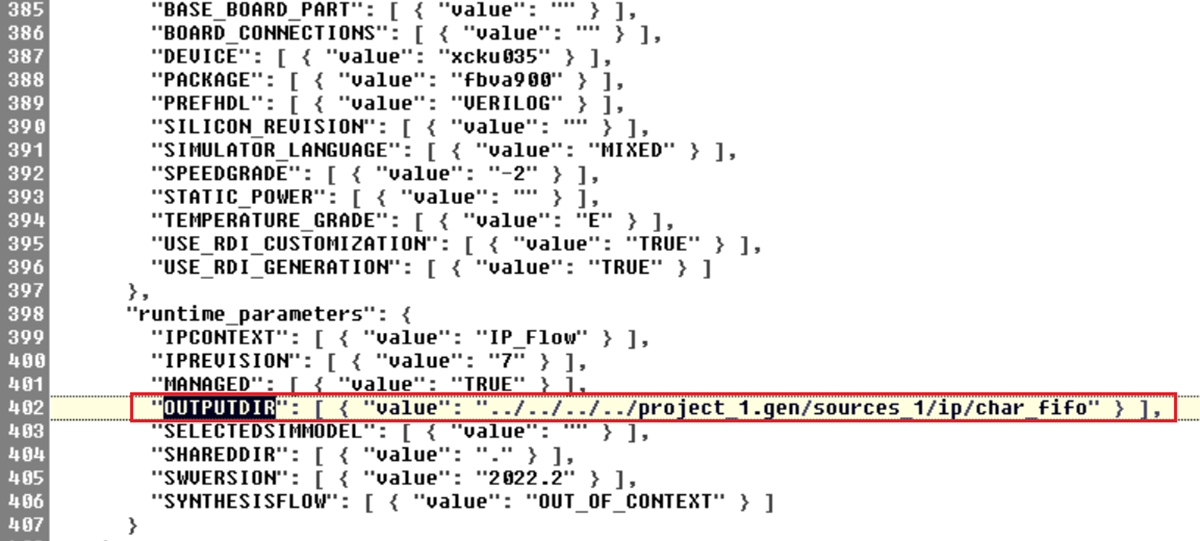
在这里我们尝试手动修改一下 outputdir,改成当前IP的output product所在的目录 "OUTPUTDIR": [ { "value": "../char_fifo" } ], 同时把原来工程中生成的output product 复制到这个目录中。
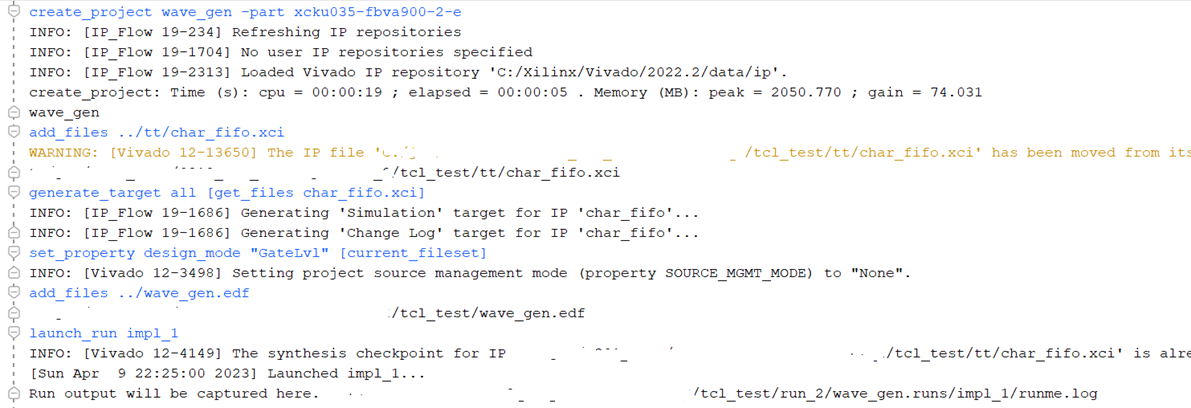
在Vivado TCL CONSOLE中重新运行一下加XCI文件的命令,可以看到以下输出:

WARNING: [IP_Flow 19-2162] IP 'char_fifo' is locked:
* Netlist project containing IP 'char_fifo' is restricted. Some IP features are unavailable. Use a managed IP or RTL project to upgrade, recustomize or generate output products.
WARNING: [Vivado 12-13650] The IP file 'XX/tcl_test/tt/char_fifo.xci' has been moved from its original location, as a result the outputs for this IP will now be generated in 'XX/tcl_test/char_fifo'. Alternatively a copy of the IP can be imported into the project using one of the 'import_ip' or 'import_files' commands.
这里可以看到XCI文件已经加到工程中,同时看到的warning是正常的,提醒用户在post-synthesis 工程中,IP是锁定的,无法修改。
在一些早期的Vivado版本中(Vivado 2022.2没有这个问题),即使IP XCI文件中OUTPUTDIR所指向的目录的确是IP output product存放的目录,依然会报ERROR: [Project 1-680]. 这里给大家介绍一下如何微调脚本解决这个问题。
新的脚本:
create_project wave_gen -part xcku035-fbva900-2-e
add_files ../tt/char_fifo.xci
generate_target all [get_files char_fifo.xci]
set_property design_mode "GateLvl" [current_fileset]
add_files ../wave_gen.edf
launch_run impl_1
这里差异在于在新工程设置为post-synthesis工程之前,先读入XCI文件并重新生成IP 的output product. 这样就不必修改xci文件的OUTPUTDIR 去指向之前output product的目录。
使用tcl命令生成的工程文件.xpr 文件可以在Vivado界面直接打开(File -> Project -> Open)。