作者:付汉杰,hankf@xilinx.com,文章转载自:赛灵思中文社区论坛
1. 介绍
Vitis是Xilinx新推出的统一软件平台,可实现在 Xilinx 所有芯片(包括 FPGA、SoC 和 Versal ACAP)上开发嵌入式软件和加速应用。Xilinx主要宣传Vitis可以为异构平台的应用实现加速。其实,Vitis也能完美的支持嵌入式软件开发。下面以MicroZed单板为例,介绍在Vitis里如何创建嵌入式软件工程,并且编译和调试,直到启动。
2. 测试环境
1). Windows 10
2). Vitis 2019.2
3). MicroZed
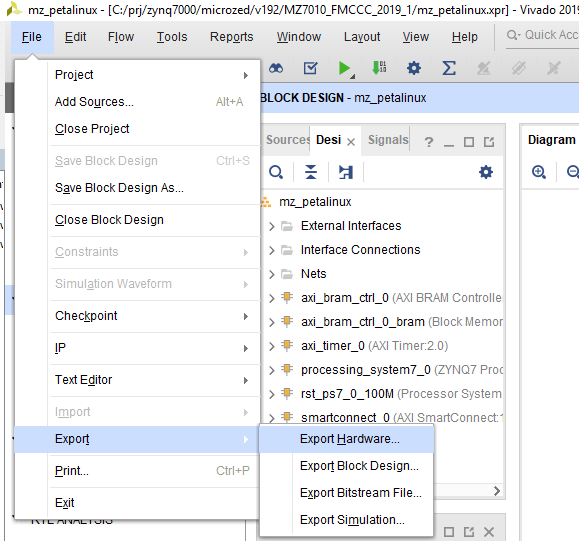
3. Vivado工程导出XSA文件
在MicroZed 2019.1 BSP下载MicroZed的Petalinux BSP。解压后,使用Vivado 2019.2 打开其中的硬件工程,升级所有IP,然后编译工程。为了测试,也可以在BD设计中,添加AXI timer,AXI BRAM等IP。成功编译工程后,导出硬件设计文件mz_petalinux_wrapper.xsa。在2019.2使用了新的硬件设计文件格式,也就是XSA文件。
3.1. BD设计
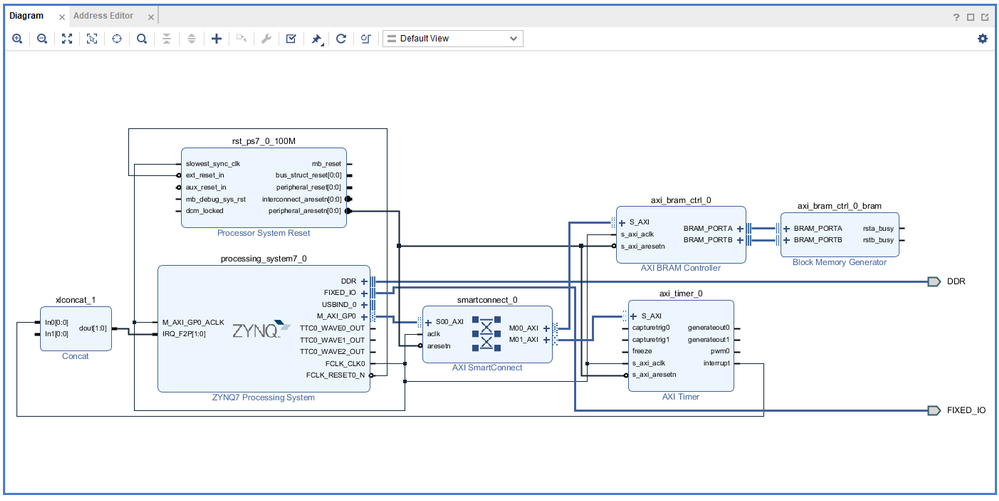
也可以不添加AXI timer,AXI BRAM等IP。
3.2. 导出硬件的菜单
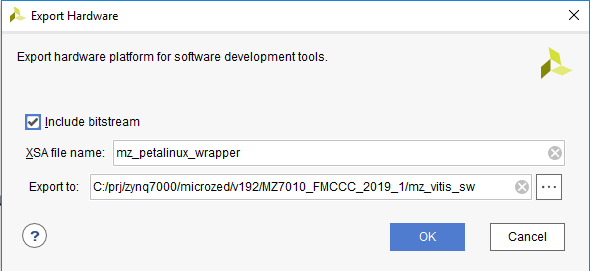
3.3. 导出硬件的界面
请指定XSA文件的路径和名字。
3.4. Vivado在TCL Console里关于导出硬件的打印。
write_hw_platform -fixed -force  -include_bit -file C:/prj/zynq7000/microzed/v192/MZ7010_FMCCC_2019_1/mz_vitis_sw/mz_petalinux_wrapper.xsa
INFO: [Vivado 12-4895] Creating Hardware Platform: C:/prj/zynq7000/microzed/v192/MZ7010_FMCCC_2019_1/mz_vitis_sw/mz_petalinux_wrapper.xsa ...
INFO: [Vivado 12-4896] Successfully created Hardware Platform: C:/prj/zynq7000/microzed/v192/MZ7010_FMCCC_2019_1/mz_vitis_sw/mz_petalinux_wrapper.xsa
write_hw_platform: Time (s): cpu = 00:00:16 ; elapsed = 00:00:17 . Memory (MB): peak = 1570.996 ; gain = 0.000
4. 创建工程
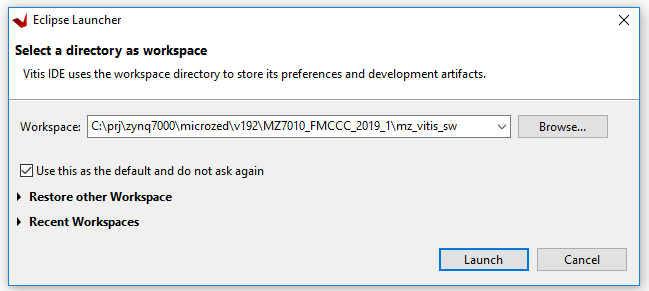
4.1. 指定workspace目录。
启动Vitis,指定它的workspace目录。
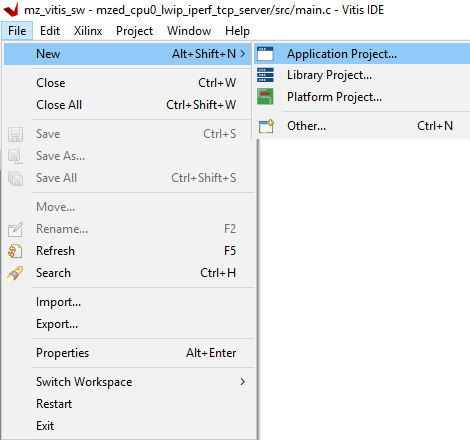
4.2. VitisFile菜单
在Vitis的File菜单里,选择"New --> Application Project"。
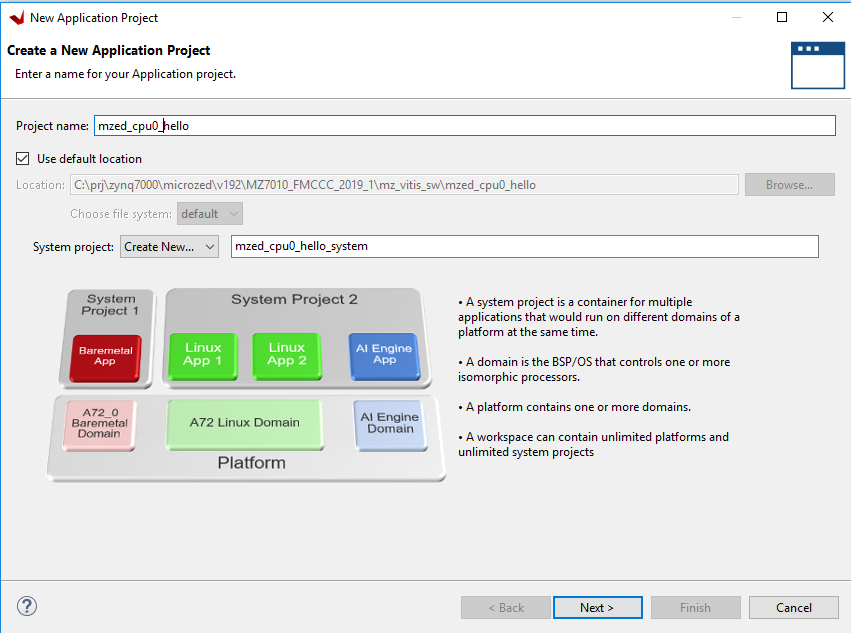
4.3. 指定Application工程名
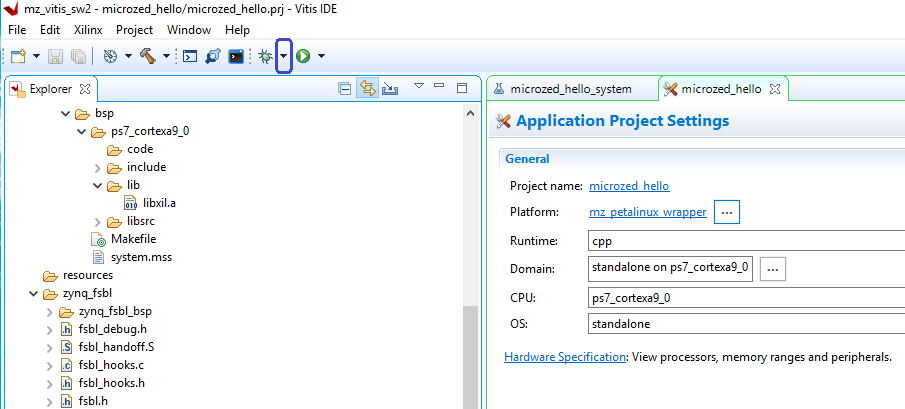
指定Application的工程名,可以使用默认的system工程名。
4.4. Platform页面
点击Next,进入Platform页面。
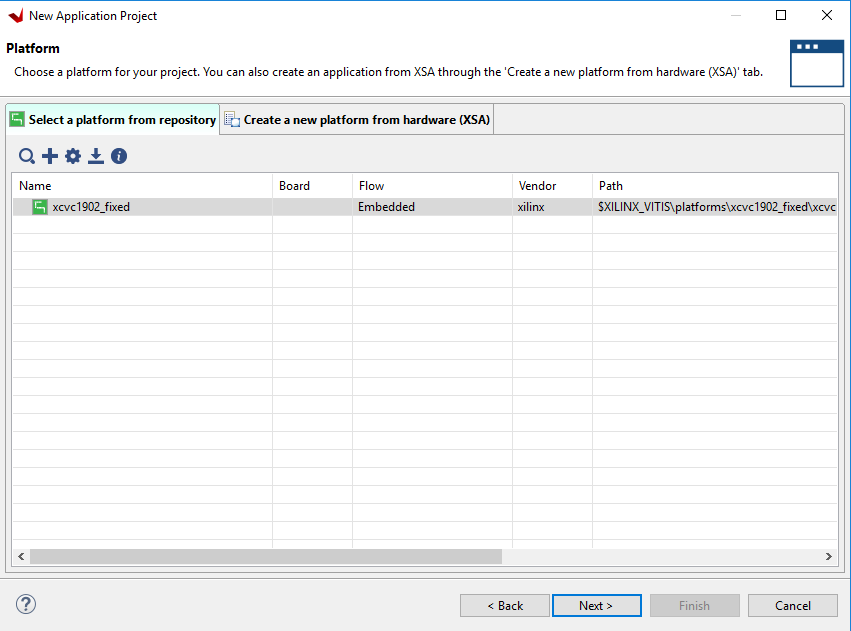
4.5. 指定XSA文件
在Platform页面,选择右边的“Creae a new platform from hardware(XSA)”, 在点击“+”,指定平台的XSA文件,然后Vitis自动创建platform。

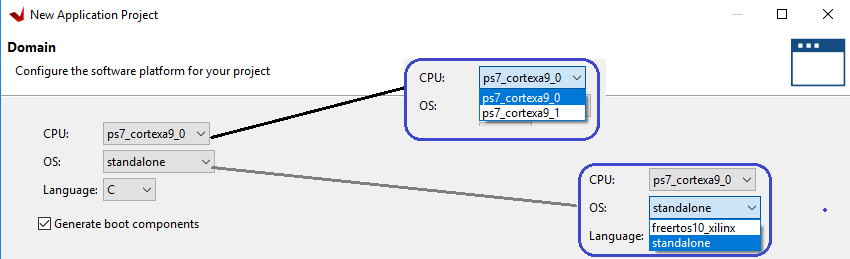
4.6. 创建Domain
点击Next,创建Domain。这时候可以选择处理器、OS、Language。
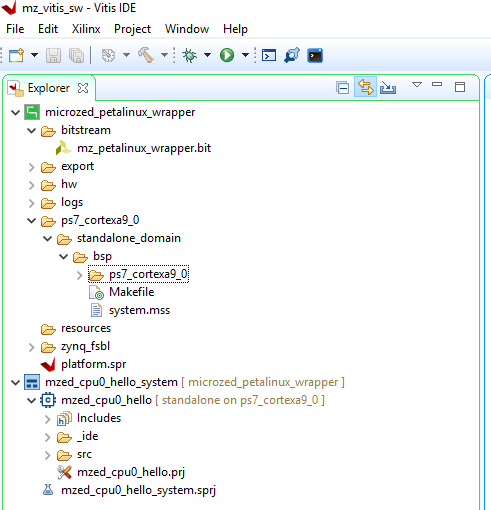
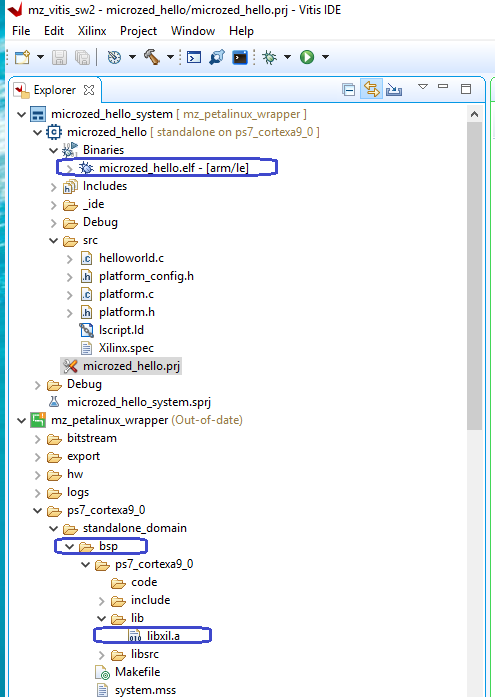
4.7. 创建工程后的目录结构。
4.8. 执行编译。
创建工程后,执行编译。会先编译FSBL工程,BSP工程,再编译应用程序工程。
Project --> Build Project
15:53:30 **** Build of configuration Debug for project mzed_cpu0_hello ****
make all
C:/Xilinx/Vitis/2019.2/gnuwin/bin/make --no-print-directory pre-build
a9-linaro-pre-build-step

C:/Xilinx/Vitis/2019.2/gnuwin/bin/make --no-print-directory main-build
Building file: ../src/helloworld.c
Invoking: ARM v7 gcc compiler
arm-none-eabi-gcc -Wall -O0 -g3 -c -fmessage-length=0 -MT"src/helloworld.o" -mcpu=cortex-a9 -mfpu=vfpv3 -mfloat-abi=hard -IC:/prj/zynq7000/microzed/v192/MZ7010_FMCCC_2019_1/mz_vitis_sw/microzed_petalinux_wrapper/export/microzed_petalinux_wrapper/sw/microzed_petalinux_wrapper/standalone_domain/bspinclude/include -MMD -MP -MF"src/helloworld.d" -MT"src/helloworld.o" -o "src/helloworld.o" "../src/helloworld.c"
Finished building: ../src/helloworld.c

Building file: ../src/platform.c
Invoking: ARM v7 gcc compiler
arm-none-eabi-gcc -Wall -O0 -g3 -c -fmessage-length=0 -MT"src/platform.o" -mcpu=cortex-a9 -mfpu=vfpv3 -mfloat-abi=hard -IC:/prj/zynq7000/microzed/v192/MZ7010_FMCCC_2019_1/mz_vitis_sw/microzed_petalinux_wrapper/export/microzed_petalinux_wrapper/sw/microzed_petalinux_wrapper/standalone_domain/bspinclude/include -MMD -MP -MF"src/platform.d" -MT"src/platform.o" -o "src/platform.o" "../src/platform.c"
Finished building: ../src/platform.c

Building target: mzed_cpu0_hello.elf
Invoking: ARM v7 gcc linker
arm-none-eabi-gcc -mcpu=cortex-a9 -mfpu=vfpv3 -mfloat-abi=hard -Wl,-build-id=none -specs=Xilinx.spec -Wl,-T -Wl,../src/lscript.ld -LC:/prj/zynq7000/microzed/v192/MZ7010_FMCCC_2019_1/mz_vitis_sw/microzed_petalinux_wrapper/export/microzed_petalinux_wrapper/sw/microzed_petalinux_wrapper/standalone_domain/bsplib/lib -o "mzed_cpu0_hello.elf"  ./src/helloworld.o ./src/platform.o   -Wl,--start-group,-lxil,-lgcc,-lc,--end-group
Finished building target: mzed_cpu0_hello.elf

Invoking: ARM v7 Print Size
arm-none-eabi-size mzed_cpu0_hello.elf  |tee "mzed_cpu0_hello.elf.size"
   text	   data	    bss	    dec	    hex	filename
  19064	   1144	  22568	  42776	   a718	mzed_cpu0_hello.elf
Finished building: mzed_cpu0_hello.elf.size

15:53:43 Build Finished (took 12s.869ms)
编译后应用程序和Domain目录结构
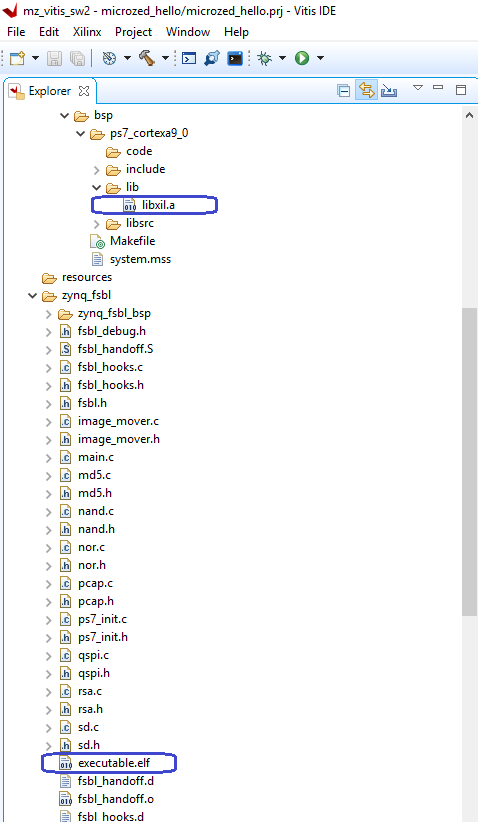
编译后FSBL目录结构
5. 调试工程 5.1. 调试配置界面
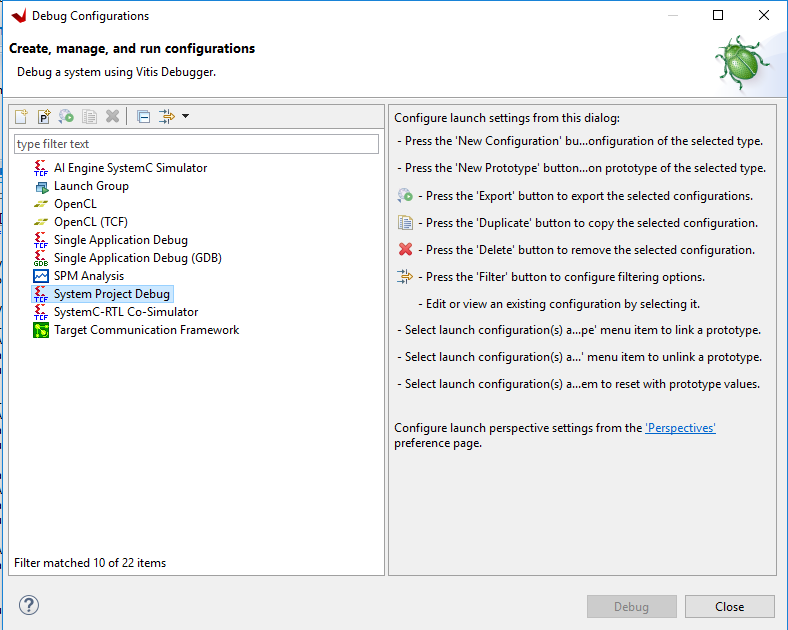
先点击想调试的工程,再点击工具条调试图标旁边的三角形,选择"Debug Configurations",
得到调试配置界面。
5.2. 自动创建调试配置
双击System Project,Vitis自动创建了调试配置。
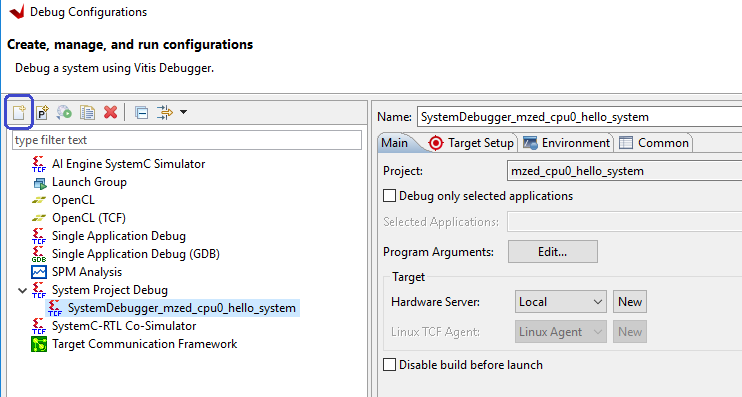
5.3. 检查调试配置的Target Setup。

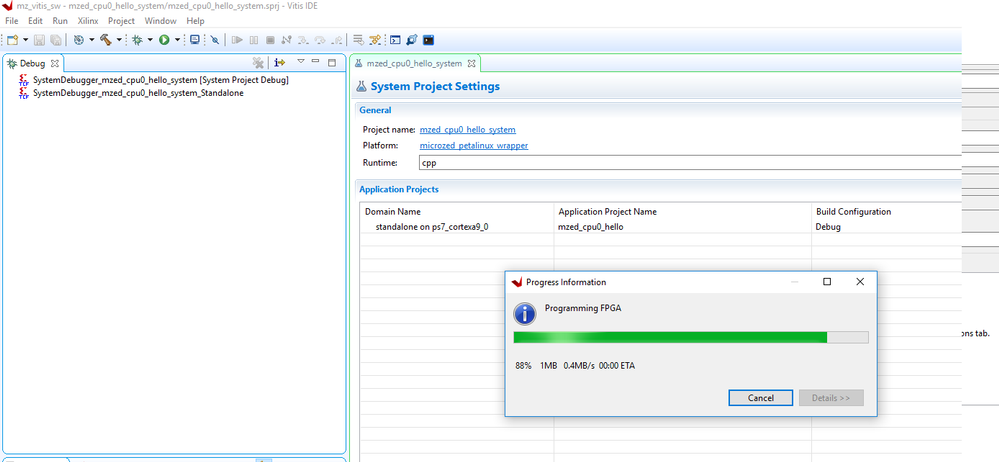
5.4. 开始调试
点击Debug后,会开始调试。由于有FPGA设计,先下载FPGA。
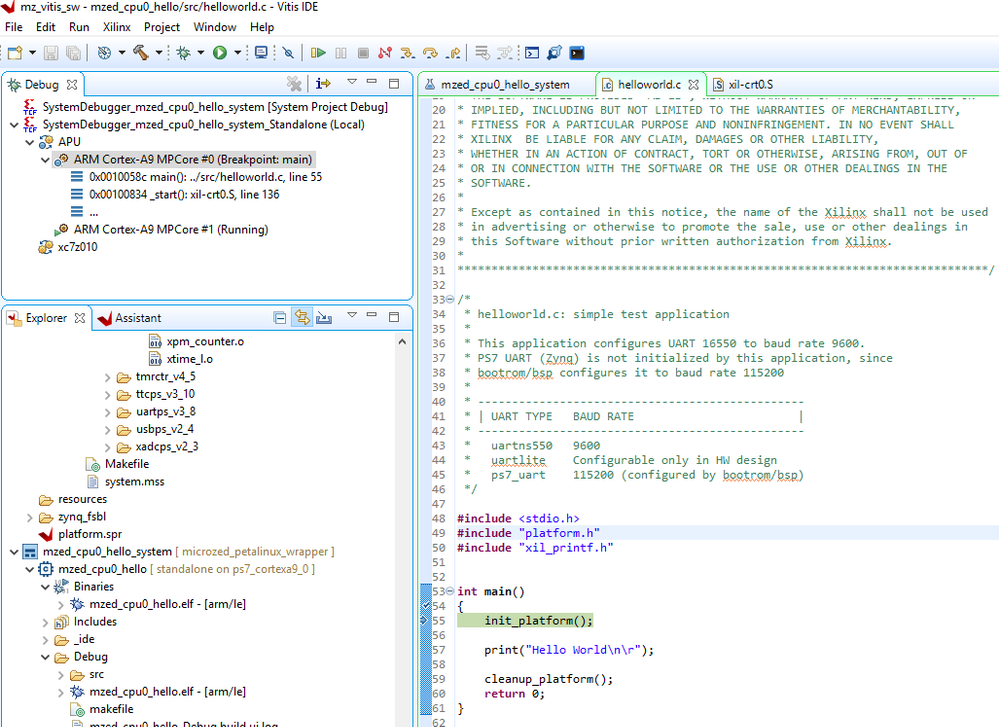
5.5. main函数入口
调试器下载所有代码后,在main函数入口处停下,等待程序员调试。
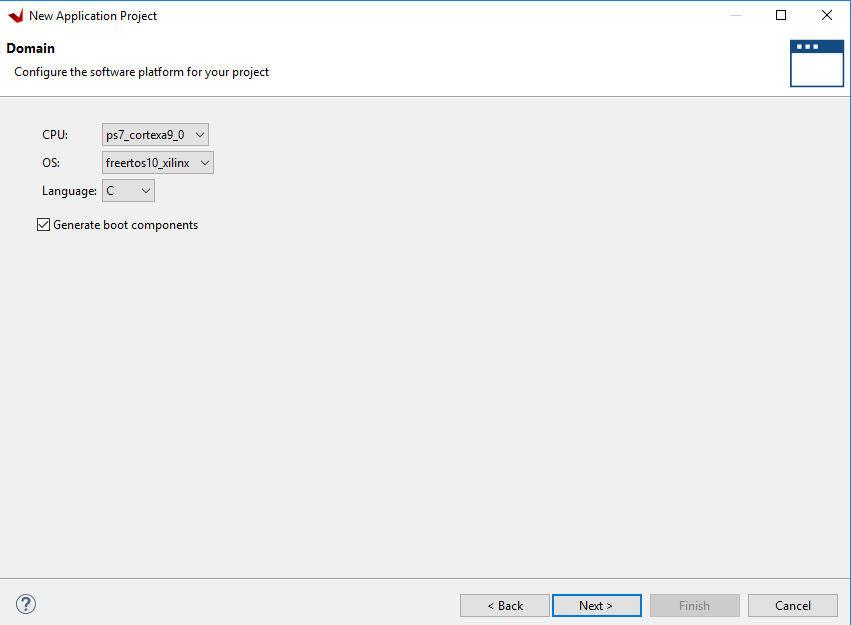
6. 调试工程 6.1. FreeRTOS
之前只是简单的Hello world工程。下面创建更复杂的FreeRTOS LWIP TCP iPerf server. 在Domain界面,为OS选择FreeRTOS。
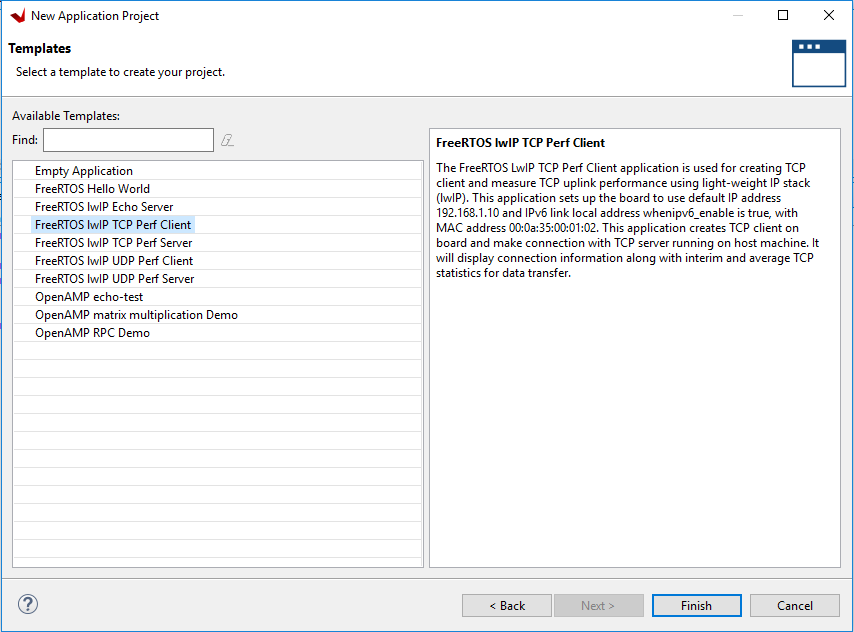
6.2. LWIP TCP iPerf server
在Templates界面,为Template选择FreeRTOS LWIP TCP Perf server。
6.3. 调试LWIP TCP iPerf server
同样的启动调试,也在main函数入口处停下,直接选择连续运行。

6.4. 连续运行
连续运行后,单板串口打印。
-----lwIP Socket Mode TCP Server Application------
Start PHY autonegotiation
Waiting for PHY to complete autonegotiation.
autonegotiation complete
link speed for phy address 0: 100
ERROR: DHCP request timed out
Configuring default IP 192.168.1.10
Board IP:       192.168.1.10
Netmask :       255.255.255.0
Gateway :       192.168.1.1

TCP server listening on port 5001
On Host: Run $iperf -c 192.168.1.10 -i 5 -t 300 -w 2M
6.5. 电脑Ping测试
设置电脑IP地址,再做Ping测试,检查单板网络是否正常。
C:\tools\iperf-2.0.5-2-win32>ping 192.168.1.10

Pinging 192.168.1.10 with 32 bytes of data:
Reply from 192.168.1.10: bytes=32 time=1ms TTL=255
Reply from 192.168.1.10: bytes=32 time<1ms TTL=255
Reply from 192.168.1.10: bytes=32 time<1ms TTL=255
Reply from 192.168.1.10: bytes=32 time<1ms TTL=255

Ping statistics for 192.168.1.10:
    Packets: Sent = 4, Received = 4, Lost = 0 (0% loss),
Approximate round trip times in milli-seconds:
    Minimum = 0ms, Maximum = 1ms, Average = 0ms
6.6. 电脑iperf测试
在电脑启动iperf测试。
C:\tools\iperf-2.0.5-2-win32>iperf -c 192.168.1.10 -i 5 -t 20 -w 2M
------------------------------------------------------------
Client connecting to 192.168.1.10, TCP port 5001
TCP window size: 2.00 MByte
------------------------------------------------------------
[  3] local 192.168.1.100 port 63484 connected with 192.168.1.10 port 5001
[ ID] Interval       Transfer     Bandwidth
[  3]  0.0- 5.0 sec  55.4 MBytes  92.9 Mbits/sec
[  3]  5.0-10.0 sec  53.4 MBytes  89.5 Mbits/sec
[  3] 10.0-15.0 sec  53.5 MBytes  89.8 Mbits/sec
[  3] 15.0-20.0 sec  53.4 MBytes  89.5 Mbits/sec
[  3]  0.0-20.0 sec   216 MBytes  90.4 Mbits/sec
6.7. 单板iperf测试串口打印
在电脑启动启动iperf测试后,单板串口打印。
[  1] local 192.168.1.10 port 5001 connected with 192.168.1.100 port 5001
[ ID] Interval    Transfer     Bandwidth
[  1]  0.0- 5.0 sec  53.2 MBytes  89.3 Mbits/sec
[  1]  5.0-10.0 sec  53.4 MBytes  89.6 Mbits/sec
[  1] 10.0-15.0 sec  53.4 MBytes  89.6 Mbits/sec
[  1] 15.0-20.0 sec  53.4 MBytes  89.6 Mbits/sec
[  1]  0.0-20.2 sec   216 MBytes  89.6 Mbits/sec
TCP test passed Successfully