作者:Florentw,AMD工程师;来源:AMD开发者社区
简介
在本文中,我们将讲解如何使用 AIE API 进行 AI 引擎内核代码矢量化,从而充分利用矢量处理器的功能。虽然要进行矢量化的内核代码是一种 FIR 滤波器,但本文焦点并非 FIR 滤波器,而在于 AIE API。
AI 引擎 API 是一种 AI 引擎内核编程的可移植接口,作为仅含 C++ 头文件的库来实现。此 API 接口的适用目标对象是当前和未来的 AI 引擎架构。如需了解有关 AIE API 的更多信息,请参阅 UG1529
注:随附示例的适用目标是 Vitis 2021.2。
FIR 滤波器
在本文中,我们将实现 1 个 8 抽头单速率非对称 FIR 滤波器,其表示方式如下,其中 N 表示抽头数:

数据按顺序经过滤波器,在每个抽头处乘以滤波器系数。
标量实现
我们可以使用基本 C 语言代码创建此 8 抽头单速率非对称 FIR 滤波器的实现。
注 1:这是非常基本的实现,不对输出数据执行任何饱和。
注 2:在本文随附的示例中,FIR 滤波器配置为处理 256 个样本 (NUM_SAMPLES = 256)。
#include
#include "kernels.h"
int16_t taps[FIR_TAPS] = { 18, 44, 54, 29, -3, -16, -7, 0};
void fir_asym_8t_16int_scalar(input_window_int16 * in, output_window_int16 * out)
{
int16 data[FIR_TAPS];
int16 acc;
int i, j;
//Initialize the data array
for( i = 0; i
data[i] = 0;
}
//Main loop
for( i = 0; i
acc = 0;
data[0] = window_readincr(in);
//Multiply the samples with the coefficient
for( j = 0; j
acc += data[j] * taps[j];
}
window_writeincr(out, acc);
//Shift the element of the data array
for( j = FIR_TAPS-1; j>=0; j--)
{
data[j] = data[j-1];
}
}
}
在随附的 ZIP 文件夹内包含调用此内核代码的 AI 引擎计算图。在 Linux 机器上,您可在 scalar 文件夹(需正确设置 Vitis 2021.2 环境)内运行“make all”来构建计算图与内核,并运行 AI 引擎编译器。
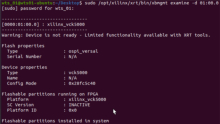
aie_engine_11_202111/scalar $ make all
现在,我们可以使用以下命令来检查从仿真输出生成的 Vitis 分析器文件:
aie_engine_11_202111/scalar $ vitis_analyzer ./Debug/aiesimulator_output/default.aierun_summary
观察剖析视图可知内核的执行时间 (fir_asym_8t_16int_scalar)

可以看到,要处理 256 个样本,已写入的内核需耗时 5661 个时钟周期(或者 5.661 us,AI 引擎阵列运行频率为 1 GHz)。
以上代码并未使用任何矢量化运算,因此它仅在运行内核的 AI 引擎拼块的标量单元上运行。使用矢量化处理器可以显著提升性能。为此,我们需要使用 AIE API,它能为我们提供运行矢量化运算的能力。
矢量化实现
现在来看看如何使用 AIE API 进行代码矢量化。
查阅 AIE API 文档 (UG1529) 即可找到 API sliding_mul_xy_ops,它能实现我们所需的乘法类型。

sliding_mul_xy_ops API 需要多个参数:
. Lanes
通道数对应于将从该运算生成的输出值的数量。对于 int16*int16 运算,可能得到 8 或 16 这 2 个值。在此处示例中,我们将使用 8 条通道。
. Points
该点数值表示用于计算每条通道的数据点的数量。鉴于我们使用 8 抽头 FIR,因此需要 8 个数据样本来计算每个输出样本
. CoeffStep
此系数阶跃用于从系数缓冲器中选择元素。我们将逐一使用所有系数,因此使用的阶跃为 1。
. DataStepXY
此数据阶跃用于从数据缓冲器中选择元素。我们将连续处理所有样本,因此使用的阶跃为 1。
. CoeffType
此系数类型表示系数元素的数据类型。我们将其设为 int16
. DataType
此数据类型表示数据元素的数据类型。我们将其设为 int16
我们需要 1 个含 16 个数据样本的矢量来馈送给滑动乘法运算 API。
其声明方式如下:
aie::vector
要加载含输入样本的数据矢量,可使用 UG1076 中记述的 window_readincr_v<8>(in) API 从输入窗口读取 8 个样本,并使用 insert() API 来将此数据插入该矢量:
data.insert(1, window_readincr_v<8>(in));
完全矢量化的代码如下所示:
#include
#include "aie_api/aie.hpp"
#include "aie_api/aie_adf.hpp"
#include "kernels.h"
static constexpr int16_t taps[FIR_TAPS] = { 0, -7, -16, -3, 29, 54, 44, 18};
void fir_asym_8t_16int_vectorized(input_window_int16 * in, output_window_int16 * out)
{
aie::vector
const aie::vector
aie::accum
constexpr unsigned CoeffStep = 1;
constexpr unsigned DataStepXY = 1;
constexpr unsigned CoeffStart = 0;
using mul_ops = aie::sliding_mul_xy_ops
data = aie::zeros
//Main loop
for( i = 0; i
// Read 8 samples and insert then in the second part of the data vector
data.insert(1, window_readincr_v<8>(in)); // 0...0 | d0..d7
//Run multiply operation
acc0 = mul_ops::mul(coeff,CoeffStart,data,1) ;
//Output 8 samples
window_writeincr(out, acc0.to_vector
// Read the next 8 samples and insert them in the first part of the data vector
data.insert(0, window_readincr_v<8>(in)); // d8...d15 | d0..d7
//Run multiply operation
acc0 = mul_ops::mul(coeff,CoeffStart,data,9) ;
//Output the next 8 samples
window_writeincr(out, acc0.to_vector
}
}
在随附的 ZIP 文件夹内包含调用此内核代码的 AI 引擎计算图。在 Linux 机器上,您可在 vectorized 文件夹(需正确设置 Vitis 环境)内运行“make all”来构建计算图与内核,并运行 AI 引擎编译器。
aie_engine_11_202111/vectorized $ make all
现在,我们可以使用以下命令来检查从仿真输出生成的 Vitis 分析器文件:
aie_engine_11_202111/vectorized $ vitis_analyzer ./Debug/aiesimulator_output/default.aierun_summary
观察剖析视图可知内核的执行时间 (fir_asym_8t_16int_vectorized):

可以看到,要处理 256 个样本,矢量化的内核需耗时 140 个周期(或者 140ns,AI 引擎阵列运行频率为 1 GHz),较标量版本性能提升 40 倍。
注:内核可进一步改进,进一步缩短执行时间。但这不在本文讨论范围内。我们将在后续博文中进一步讲解内核最优化技巧。
结论
在本文中,我们讲解了如何编写基本非对称 FIR 滤波器的矢量化版本,并在 AI 引擎上使用 AIE API 运行该版本,从而充分发挥 AI 引擎的矢量处理器的能力。
在下一篇博文中,我们将了解如何使用 Vitis 库中包含的 DSP 库来实现相同的 FIR,而无需编写任何内核代码。