本文转载自:亦梦云烟的博客
简介
PetaLinux是一个嵌入式Linux系统开发工具,用于设计Xilinx基于FPGA的SOC片上系统。本节为第一节,旨在介绍如何使用PetaLinux工具。
软件环境: windows 10 64bit,VMware 12, ubuntu 16, Vivado2018.2
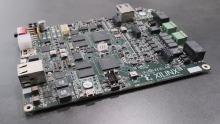
硬件环境: 米尔科技Zturn board
安装vmware后在其中安装ubuntu。
一、安装PetaLinux开发环境
安装PetaLinux要求:
在非root权限下安装
PetaLinux依赖很多标准开发工具和库,需要先安装下表中的依赖。
表1-1 Packages and Linux workstation Environments

安装步骤如下。
1.1 安装Petalinux依赖库
首先更新源:sudo apt-get update,然后更具官方手册安装依赖库:
$ sudo apt-get install tofrodos iproute2 gawk xvfb gcc git make net-tools libncurses5-dev tftpd zlib1g-dev libssl-dev flex bison libselinux1 gnupg wget diffstat chrpath socat xterm autoconf libtool tar unzip texinfo gcc-multilib build-essential libsdl1.2-dev libglib2.0-dev libssl-dev screen pax gzip
Note:上述命令带有回车,在直接复制时需要去除回车符!
安装完成后更新:
$ sudo apt-get upgrade
1.2 安装petalinux
从官网下载好petalinux,笔者下载的2018.2版本。
$ mkdir -p /home/software/petalinux
$ cd /home/software/petalinux
将petalinux-v2018.2-final-installer.run拖拽到petalinux文件夹下。
$ mkdir -p /opt/pkg/petalinux
$ sudo chmod 755 /opt/pkg/petalinux
$ ./petalinux-v2018.2-final-installer.run /opt/pkg/petalinux
Note:不使用root权限进行安装,/opt/pkg/petalinux的权限应该是755,当然安装目录也可以是其他任何目录,但权限必须是755.
安装过程输出信息如下:
$./petalinux-v2018.2-final-installer.run /opt/pkg/petalinux
INFO: Checking installer checksum...
INFO: Extracting PetaLinux installer...

LICENSE AGREEMENTS

PetaLinux SDK contains software from a number of sources.  Please review
the following licenses and indicate your acceptance of each to continue.

You do not have to accept the licenses, however if you do not then you may
not use PetaLinux SDK.

Use PgUp/PgDn to navigate the license viewer, and press 'q' to close

Press Enter to display the license agreements
Do you accept Xilinx End User License Agreement? [y/N] > y
Do you accept Webtalk Terms and Conditions? [y/N] > y
Do you accept Third Party End User License Agreement? [y/N] > y
INFO: Checking installation environment requirements...
INFO: Checking free disk space
INFO: Checking installed tools
INFO: Checking installed development libraries
INFO: Checking network and other services
INFO: Installing PetaLinux...
INFO: Checking PetaLinux installer integrity...
INFO: Installing PetaLinux SDK to "/opt/pkg/petalinux/."
................................................................................................................................................................................................................................................................................INFO: Installing aarch64 Yocto SDK to "/opt/pkg/petalinux/./components/yocto/source/aarch64"...
PetaLinux Extensible SDK installer version 2018.2
=================================================
You are about to install the SDK to "/opt/pkg/petalinux/components/yocto/source/aarch64". Proceed[Y/n]? Y
Extracting SDK................................done
Setting it up...
Extracting buildtools...
done
SDK has been successfully set up and is ready to be used.
Each time you wish to use the SDK in a new shell session, you need to source the environment setup script e.g.
 $ . /opt/pkg/petalinux/components/yocto/source/aarch64/environment-setup-aarch64-xilinx-linux
INFO: Installing arm Yocto SDK to "/opt/pkg/petalinux/./components/yocto/source/arm"...
PetaLinux Extensible SDK installer version 2018.2
=================================================
You are about to install the SDK to "/opt/pkg/petalinux/components/yocto/source/arm". Proceed[Y/n]? Y
Extracting SDK..............................done
Setting it up...
Extracting buildtools...
done
SDK has been successfully set up and is ready to be used.
Each time you wish to use the SDK in a new shell session, you need to source the environment setup script e.g.
 $ . /opt/pkg/petalinux/components/yocto/source/arm/environment-setup-cortexa9hf-neon-xilinx-linux-gnueabi
INFO: Installing microblaze_full Yocto SDK to "/opt/pkg/petalinux/./components/yocto/source/microblaze_full"...
PetaLinux Extensible SDK installer version 2018.2
=================================================
You are about to install the SDK to "/opt/pkg/petalinux/components/yocto/source/microblaze_full". Proceed[Y/n]? Y
Extracting SDK.............................done
Setting it up...
Extracting buildtools...
done
SDK has been successfully set up and is ready to be used.
Each time you wish to use the SDK in a new shell session, you need to source the environment setup script e.g.
 $ . /opt/pkg/petalinux/components/yocto/source/microblaze_full/environment-setup-microblazeel-v10.0-bs-cmp-re-mh-div-xilinx-linux
INFO: Installing microblaze_lite Yocto SDK to "/opt/pkg/petalinux/./components/yocto/source/microblaze_lite"...
PetaLinux Extensible SDK installer version 2018.2
=================================================
You are about to install the SDK to "/opt/pkg/petalinux/components/yocto/source/microblaze_lite". Proceed[Y/n]? Y
Extracting SDK.............................done
Setting it up...
Extracting buildtools...
done
SDK has been successfully set up and is ready to be used.
Each time you wish to use the SDK in a new shell session, you need to source the environment setup script e.g.
 $ . /opt/pkg/petalinux/components/yocto/source/microblaze_lite/environment-setup-microblazeel-v10.0-bs-cmp-re-ml-xilinx-linux
INFO: PetaLinux SDK has been installed to /opt/pkg/petalinux/.
Important:PetaLinux要求系统"/bin/sh"是bash,但ubuntu默认的是dash,需要将系统的脚本命令配置为bash
设置petalinux:
$ source /opt/pkg/petalinux/settings.sh
输出消息如下:
PetaLinux environment set to '/opt/pkg/petalinux'
INFO: Checking free disk space
INFO: Checking installed tools
INFO: Checking installed development libraries
INFO: Checking network and other services
检查是否配置好:
echo $PETALINUX
输出如下:
/opt/pkg/petalinux
为了开机自动添加petalinux的环境配置,将设置环境的命令添加到ubuntu自启动脚本中。用root权限打开~/.bashrc文件,在文件最后添加设置命令:
source /opt/pkg/petalinux/settings.sh
1.3 安装PetaLinux BSP
Xilinx提供了用于用户创建自己的工程的参考工程样例,这些工程提供了BSP文件,包括所有必须的设计文件和配置文件,构建和测试硬件软件镜像,可以直接在QEMU仿真系统中启动。
首先从官网下载Petalinux BSP工程。下载ZED board的BSP。
使用petalinux-create命令创建工程:
$ petalinux-create -t project -s < path-to-bsp>
输出如下消息:
INFO: Create project:
INFO: Projects:
INFO: 	* avnet-digilent-zedboard-2018.2
INFO: has been successfully installed to /home/xxx/workspace/petalinux/
INFO: New project successfully created in /home/xxx/workspace/petalinux/
1.4 编译并测试参考例程
在1.3生成的文件夹目录下进行系列操作:
编译:
$ petalinux-build
生成设备树文件,fsbl, uboot文件,linux内核和文件系统镜像,最后打包成一个启动镜像文件。
编译完成后生成的文件在目录
PetaLinux提供了QEMU的支持,在软件环境下模拟硬件测试PetaLinux软件镜像。
在工程目录下启动linux内核镜像:
$ petalinux-boot --qemu --prebuilt 3
--qemu告诉petalinux-tool启动QEMU,--prebuilt 3启动linux内核。
--prebuilt 1用于1级(FPGA比特流)启动,在QEMU中无效
--prebuilt 2启动U-boot
--prebuilt 3启动Linux镜像

图1-1 QEMU启动zed
Tip:退出QEMU:同时按住Ctrl+A,松开后按X
启动Linux内核也可以用以下命令:
$ petalinux-boot --qemu --kernel
参考资料
[1] ug1144-petalinux-tools-reference-guide.pdf
[2] ug1156-petalinux-tools-workflow-tutorial.pdf


